Have you ever wondered how some brands consistently post high-quality content on Facebook without missing a beat? It is because they have enough time to be more creative with their content strategy making them more engaging. You can schedule Facebook posts to gain that extra time under your clock. You can streamline your social media efforts, save time, and maintain a consistent online presence by mastering the art of automated Facebook posting.
Strategic planning and automating Facebook posts would help marketers keep their audience engaged.
In this blog, we will delve into the importance and how to schedule Facebook posts, the benefits of using a Facebook content calendar, and the best practices for automated Facebook posting.
Listen To The Podcast Now!
Why Schedule Facebook Posts?
Scheduling Facebook posts offers numerous benefits that can significantly enhance your social media strategy. One of the primary advantages is consistency. By planning your posts, you ensure to deliver fresh content, keeping your brand top-of-mind. Furthermore, scheduling allows you to reach your audience at the optimal times, maximizing engagement and visibility.
Even if you post consistently, you might not reach your target audience. This could be because you’re not sharing content at the best times when your audience is most active on Facebook.
Find The Best Time To Schedule Facebook Posts
The posting time can significantly increase the post’s performance. Posting when your audience is most active can lead to higher engagement rates and greater reach. But how do you figure out the best posting time?
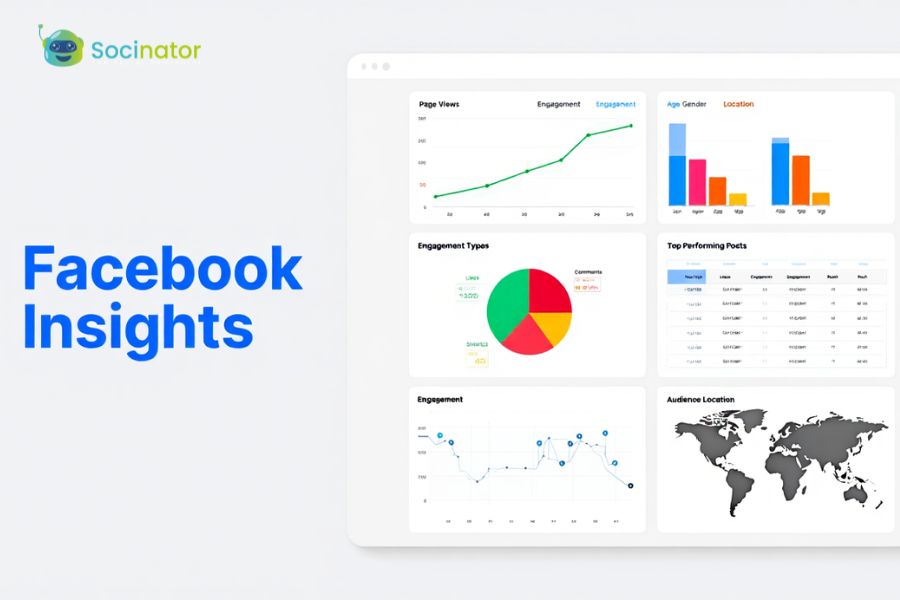
Start by analyzing your Facebook Insights to understand when your audience is online. Generally, the best times to post are during lunch hours (12 PM – 2 PM) and in the evening (5 PM – 7 PM), but this can vary based on your specific audience and industry.
Now that we understand the importance of timing, let’s explore why having a Facebook content calendar is essential.
The Power Of A Facebook Content Calendar
A Facebook content calendar helps you to organize and manage your social media posting. It is an essential tool for any social media manager. It helps you ensure a balanced mix of posts to showcase different aspects of your brand by allowing you to plan and organize your content in advance. You can schedule promotional and informational posts to create a well-rounded content strategy with a content calendar.
Creating a content calendar involves mapping out your posts for the month, including the type of content, the copy, the images, and the scheduled times. This organized approach saves time, reduces last-minute stress, and ensures a consistent posting schedule.
Next, we will learn to create a social media calendar through easy steps.
Create A Social Media Calendar
An effective social media content calendar is essential for organized and strategic posting. Let us dive into the steps:
- Audit Your Social Networks and Content:
-
- Understand your existing social media accounts thoroughly.
- Use a social media audit template to record:
- Impostor accounts and outdated profiles.
- Account security details.
- Set goals and KPIs specific to the accounts and platforms.
- Target audience demographics and personas.
- Team responsibilities.
- Successful past posts and campaigns.
- Areas for improvement and key metrics.
- Competitor insights.
2. Choose Your Post Types and Formats:
-
- Decide on the types of content you will create (photos, videos, links, etc.).
- Consider your audience preferences and platform-specific requirements.
3. Plan Your Posting Frequency:
- Determine how often you will post on each social network.
- Analyze your analytics for insights on optimal posting times and frequency.
4. Use a Calendar Tool:
- Opt for tools like Google Calendar, Excel, or specialized social media scheduling tools.
- Include details for each post:
- Date and time.
- Platform.
- Post content (text, images, videos).
- Hashtags.
Creating a content calendar helps you maintain consistency and schedule Facebook posts in a planned and organized manner. Next, we will explore how to schedule your posts on Facebook.
How To Schedule Facebook Posts
Automated Facebook posting is a game-changer for social media managers. There are two ways in which you can schedule Facebook posts.
Using Meta Business Suite
Here is a step-by-step tutorial on how to schedule posts on Facebook using Meta:
1: Access Your Facebook Account
- Head over and log in to your Facebook account.
- Ensure you have a Facebook Page or are an administrator of a Page.
2: Access Meta Business Suite
- In the top left corner of your Facebook Page click on the Meta icon (⌐).
- – From the dropdown option select “Meta Business Suite”.
3: Create a New Post
- Click the “Posts” tab.
- Click the “Create Post” button.
- Select the format, images, or videos you want to post.
4: Schedule Your Post
- Click the three dots (…) at the bottom right of the post composer.
- Select “Schedule Post”.
- Choose the perfect time and date suitable for posting.
- Click “Schedule”.
5: Review and Confirm
- In the “Scheduled Posts” section you can review your scheduled post.
- Confirm that the date, time, and content are correct.
That is it! You have now scheduled a Facebook post which will be published on your Facebook Page at the specified date and time.
2. Third-party Scheduling Tools
By using third-party automation tools like socinator, you can schedule Facebook posts in advance and publish them automatically. It not only saves time but also ensures that your posts go live even when you are not available.
These tools allow you to schedule posts across multiple platforms, track engagement, and adjust your strategy based on real-time data.
There are so many tools in the market, that it is hard to choose the right one. Let us explore the best social media automation tool next.
Also Read
Why You Should Schedule A Facebook Post Timely And How To Do It
9 Reasons Why To Use Social Media Scheduling Tool To Manage Multiple Social Media Accounts
What Is The Best Time To Post On Facebook?
Socinator: Facebook Automation Tool
Socinator is a powerful automation tool that makes managing your content easier and more effective. It helps you schedule Facebook posts, organize your posting strategy, and take advantage of advanced features. Whether you’re juggling multiple accounts or just want to streamline your content, Socinator simplifies the process so you can focus on creating content that matters. Now, let us delve into Socinator’s advanced features:
Auto Send/Accept/Cancel Friend Requests
Automate your growth by sending, accepting, or canceling friend requests effortlessly. Configure your settings to identify and connect with your target audience seamlessly.
Auto Like & Comments
Boost your organic reach with automated likes and comments on Facebook. Engage with your community and show appreciation for their support without spending hours online.
Auto-Like Facebook Pages
Schedule and automate likes on Facebook pages relevant to your business niche. Enhance your network and stay connected with industry-related pages effortlessly.
Auto Share Facebook Posts
Increase traffic and visibility with the Facebook auto-share feature. Enhance your profile visibility and reach a wider audience effortlessly.
Auto Wish on Life Events
Socinator helps you track and record important events, product launches, and campaigns with its events manager. Ensure you never miss a significant occasion and stay on your game.
Broadcast Messages
Schedule and broadcast announcements via direct messages with ease. It buys you more time and saves effort by automating your messaging and communication.
Auto Reply to New Messages
Never miss an important message again with our auto-reply feature. Stay connected and responsive 24/7, streamlining your communication like never before.
Now that we have the tool. Let us learn how to schedule Facebook posts using Socinator.
How To Schedule Facebook Posts With Socinator
This tutorial will walk you through scheduling Facebook posts using Socinator, a powerful social media management tool. The features demonstrated in this tutorial aim to streamline automating post scheduling, configurations, auto hashtagging, and friend tagging. Let us dive into the steps for efficient social media marketing.
Here are the steps to schedule a post using Socinator:
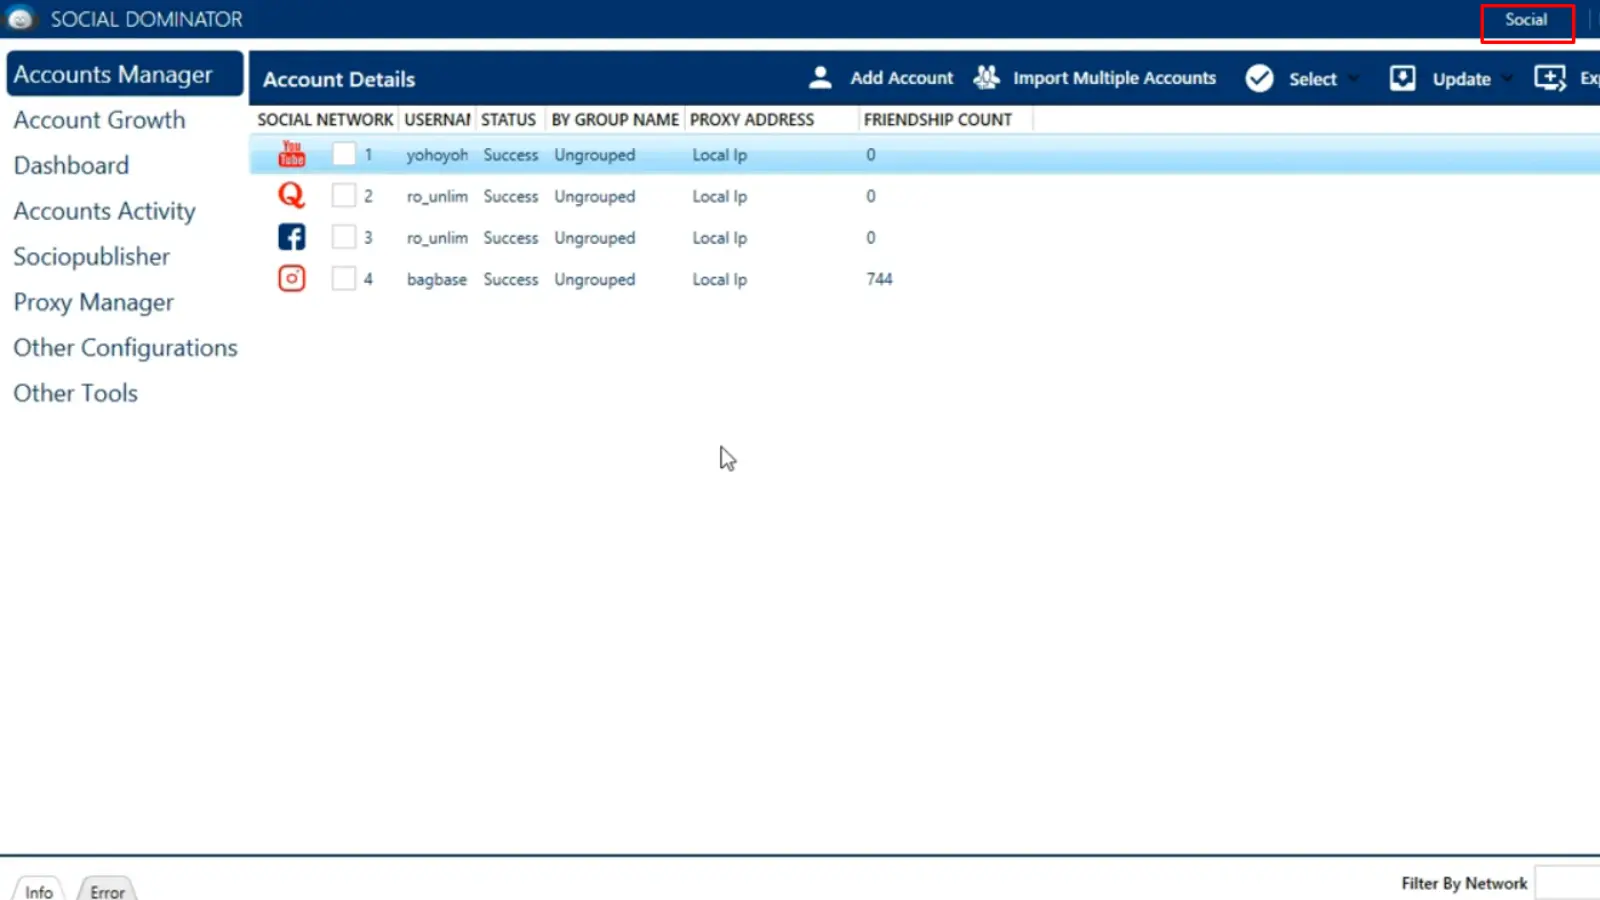
1. Open Socinator:
Start by opening the Socinator app and make sure the “Social” tab is selected in the upper right corner.
2. Access Socio-Publisher:
Click on the “Socio-Publisher” option to go to the publisher page.
3. Create a Campaign:
Click on the “Create Campaign” button. You can either assign a unique name to your campaign or use a default campaign ID.
4. Create a Post:
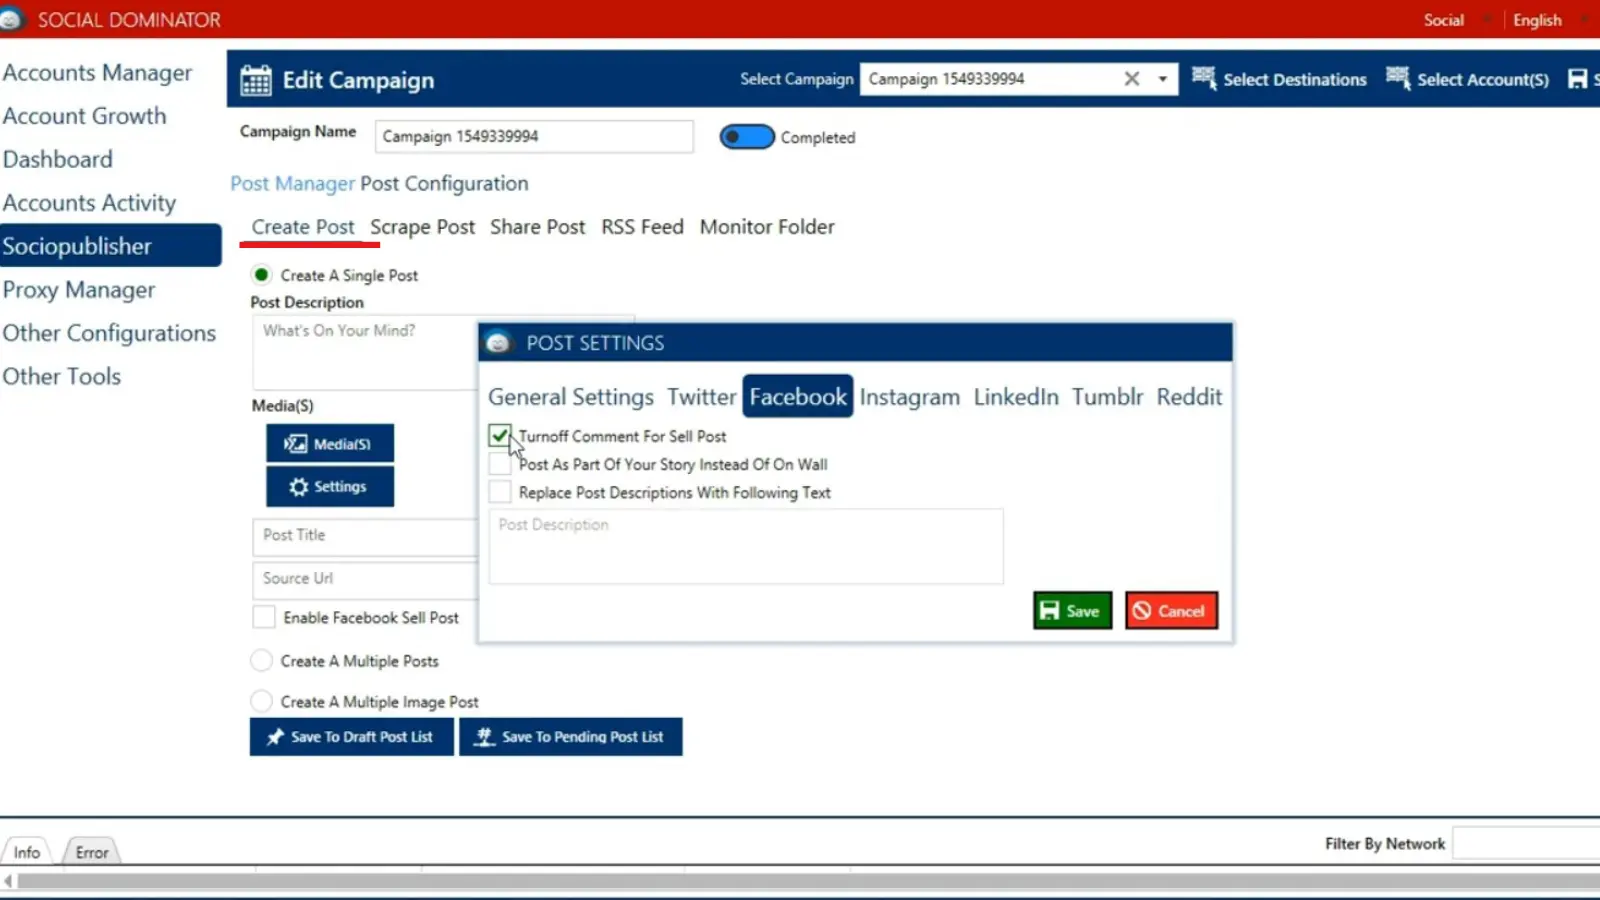 Under “Post Manager,” choose “Create Post.”
- Enter your post description in the provided text box.
- To add media, click the “Media” button, select images or videos, and upload them.
Configure post settings by clicking the “Settings” button. Here, you can enable options like turning off comments or posting as a Facebook story.
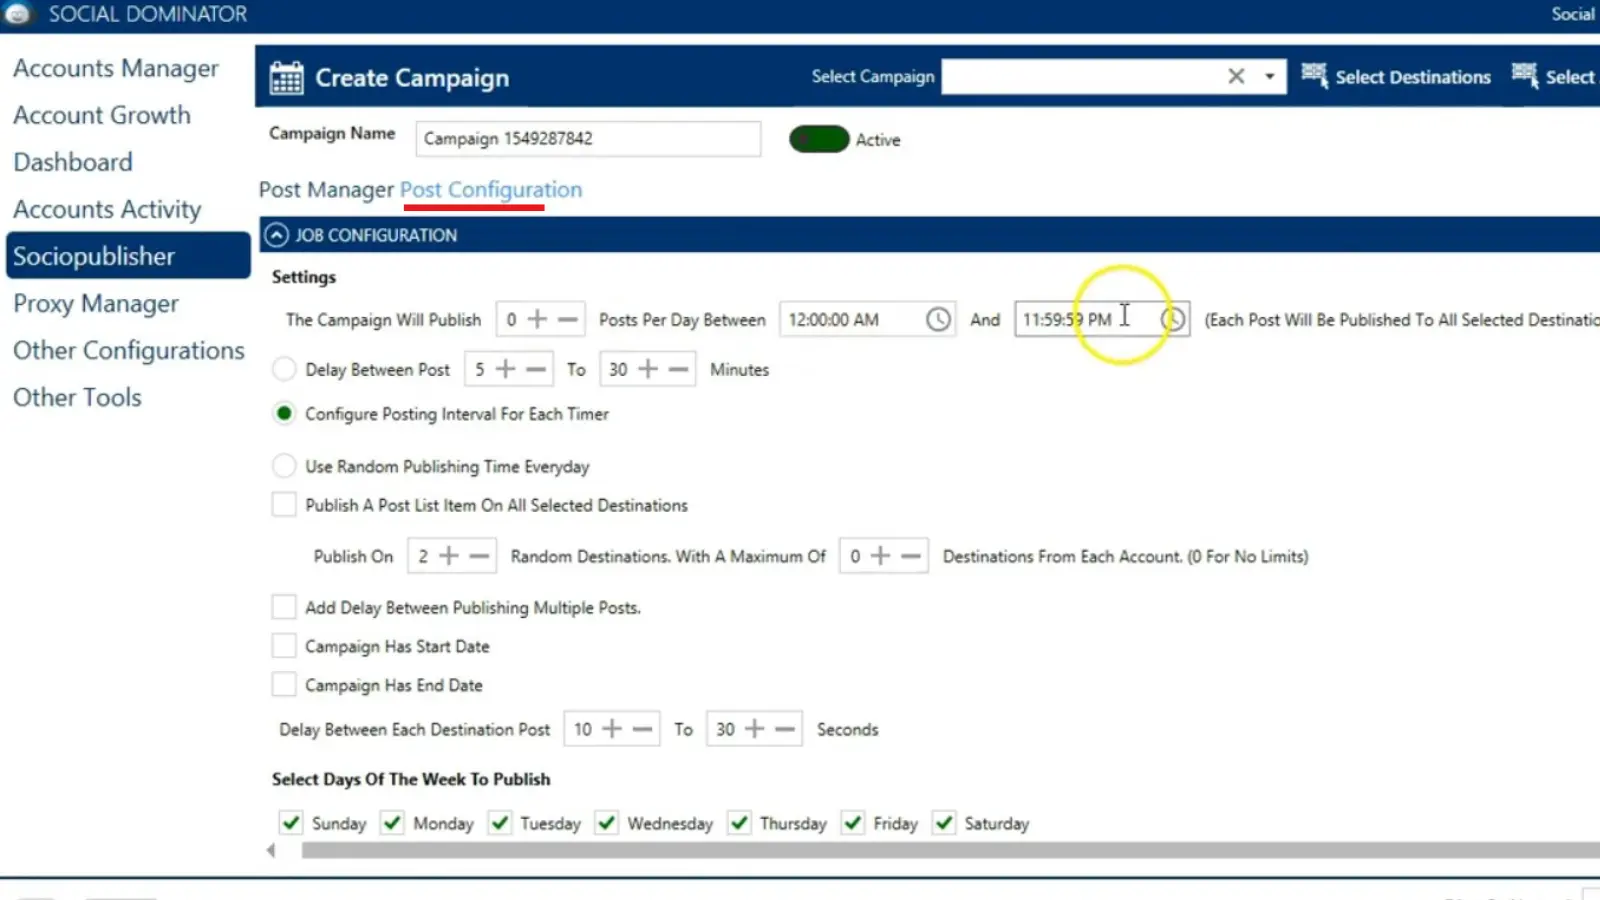
5. Set Posting Configuration:
- Under the “Post Configuration” section, set the number of posts per day, start time, end time, and delay between posts.
- Choose the days of the week you want your posts to be published.
- Specify the start and end date for the campaign using the calendar option.
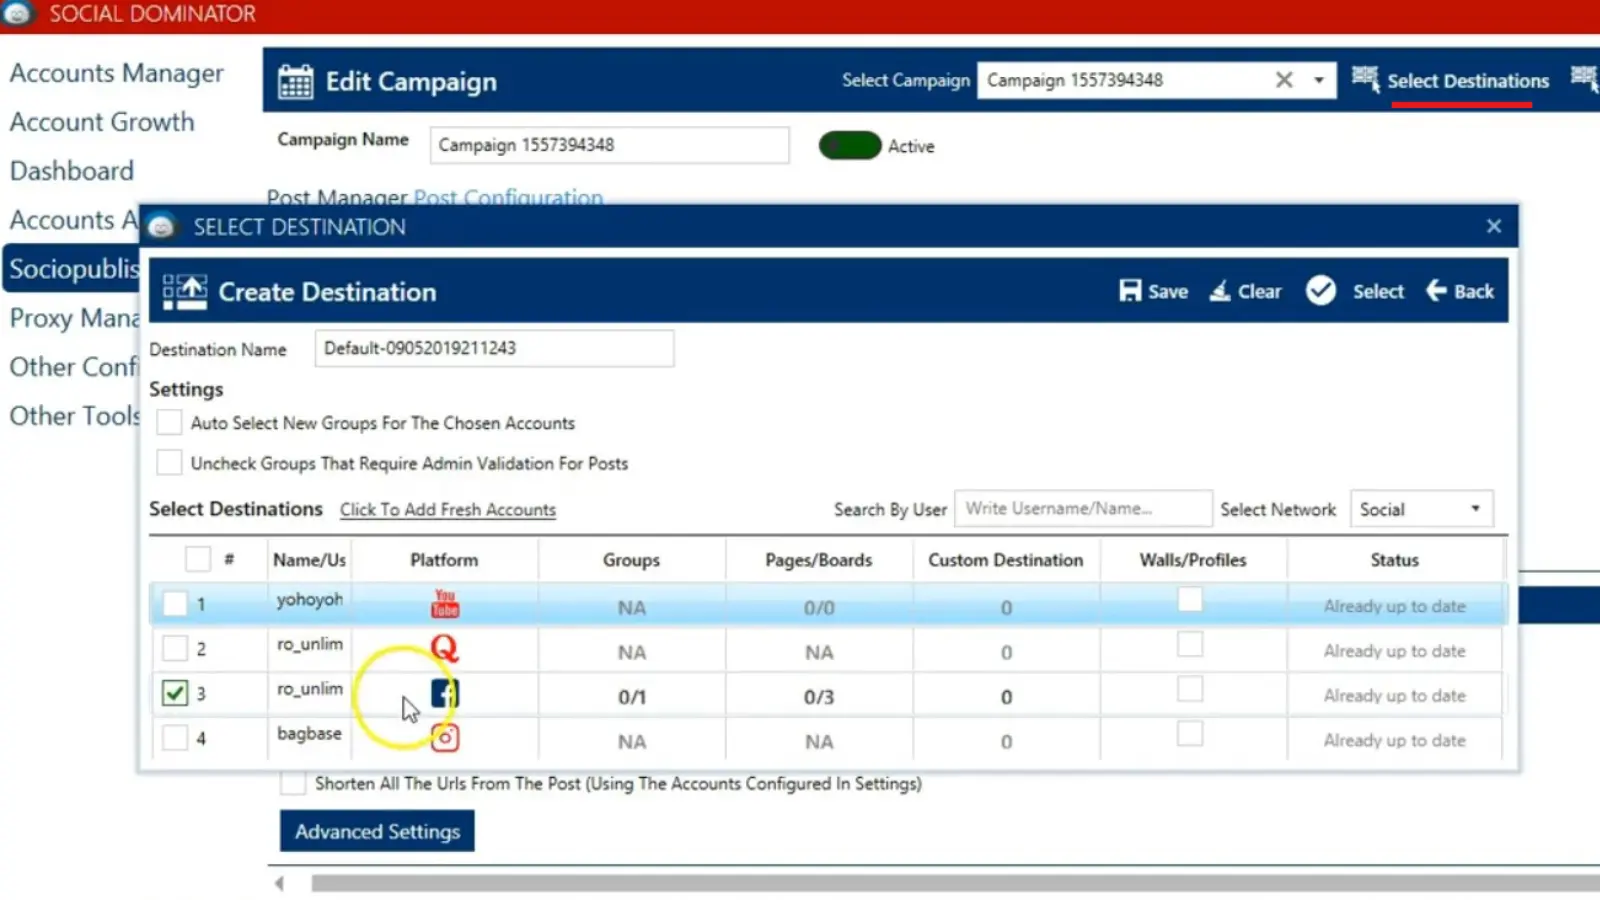
6. Select Destinations:
- Click the “Select Destinations” button to choose where the post will be published (e.g., Facebook groups, pages, walls).
- Select your Facebook account and other desired locations.
7. Save the Campaign:
After configuring your settings and selecting your destinations, click the “Save” button to finalize and schedule your post.
By following these steps and leveraging Socinator’s powerful features, you can efficiently schedule and automate Facebook posts for effective social media marketing campaigns. Stay ahead of your social media strategy with streamlined automation and optimization through Socinator.
You know how to schedule Facebook posts. It is time to learn some of the best practices for social media automation.
Best Practices for Social Media Automation
While automation can significantly enhance your social media strategy, it is essential to use it effectively. The following are some best practices for social media automation:
- Maintain Authenticity: Even when automating posts, it’s crucial to keep them genuine and relatable. Automation should enhance your content, not make it feel impersonal or overly sales-driven. Make sure your posts still reflect your brand’s voice and connect with your audience on a human level.
- Monitor Engagement: Automation isn’t a “set it and forget it” approach. It’s important to monitor how your audience interacts with your posts actively. Respond to comments, engage in conversations, and stay connected with your followers. This ongoing interaction helps build and maintain strong relationships with your audience.
- Analyze Performance: Leverage analytics to understand how your automated posts are performing. Track metrics such as likes, shares, and comments to gauge what’s working and what needs improvement. Use this data to refine your strategy and ensure your content continues to resonate with your audience.
- Stay Flexible: While automation allows for efficient scheduling, it’s important to stay adaptable. Be ready to tweak or reschedule posts in response to real-time events, trends, or shifts in audience behavior. Flexibility ensures that your content remains relevant and timely, even in a dynamic digital landscape.
These are some of the best practices. Now let us delve into common mistakes while scheduling posts.
What Are The Common Mistakes To Avoid While Scheduling Facebook Posts
When scheduling Facebook posts, here are some common mistakes to steer clear of:
- Publishing the Same Content Everywhere: Each social network has its unique audience, post format, and best practices. Ready your content for each platform to engage effectively.
- Focusing on Quantity Over Quality: While consistency matters, prioritize high-quality content over frequent posts. Aim for expert-level or “wow” content that resonates with your audience.
- Ignoring Post Metrics: Regularly review your post performance metrics. Alter and adjust your campaign strategy based on the performance of the posts.
- Reusing Non-Evergreen Content: Avoid recycling outdated or irrelevant posts. Fresh, evergreen content performs better in the long run.
- Forgetting to Review Your Queue: Double-check your scheduled posts. Check again to make sure the post aligns with your current marketing goals and events.
- Skipping Embedded Link Descriptions: When sharing links, add compelling descriptions. Encourage clicks by providing context.
- Not Tailoring Posts to Each Platform: Customize your content for LinkedIn, Instagram, Twitter, etc. Understand the nuances of each platform and adapt your messaging accordingly.
Conclusion
To Schedule Facebook posts there are two ways as discussed in the blog. It is a powerful strategy to enhance your social media presence, save time, and improve engagement. By understanding the best times to post, utilizing a Facebook content calendar, embracing automated Facebook posting, and choosing the right tools, you can streamline your social media management and achieve better results.
Create your Facebook content calendar, explore the best automation tools, and schedule Facebook posts. With these strategies in place, you will be well on your way to maintaining a consistent and impactful presence on Facebook.
Faqs
Can You Schedule Facebook Posts in Bulk?
Absolutely! With Planable, scheduling Facebook posts in bulk is a breeze. The platform’s bulk upload feature allows you to upload all your content in one go, streamlining your social media management.
For instance, if a client provides photos, you can upload all the images simultaneously. This method helps you track which assets are used and which are still available. Scheduling posts in bulk ensures a consistent posting schedule and provides better visibility into any gaps in your content calendar. This efficiency not only saves time but also enhances your overall social media strategy by maintaining regular engagement with your audience.
Can I backdate a Facebook post?
You are in luck! You can tweak the date of your posts, including life events, photos, and videos.
How can I enable ad scheduling on Facebook?
- Start by creating a new ad set or editing an existing one.
- Scroll down to the “Budget & Schedule” section.
- From the dropdown menu, choose “Lifetime Budget.”
- Click on “Show More Options,” then hover over “Ad Scheduling” and select “Edit.”
- Finally, choose “Run ads on a schedule” to set your preferred times.

